Why DIY Your Own Monogrammed Napkins?
Creating your own personalized napkins offers numerous benefits beyond just cost savings. You have complete creative control, can match exact colors and styles, and create truly unique pieces for your special occasions.
💰 Cost Savings
DIY napkins cost significantly less than custom orders, especially for large quantities
🎨 Creative Freedom
Complete control over design, colors, fonts, and personalization elements
⏰ Flexible Timeline
Work at your own pace without waiting for custom order lead times
🏠 Personal Satisfaction
Pride in creating something beautiful and meaningful with your own hands
Choose Your DIY Method by Skill Level
🟢 Beginner
Time: 10-30 minutes per napkin
Methods:
- Iron-on transfers
- Fabric markers
- Vinyl decals
- Fabric paint stencils
Tools needed: Iron, basic crafting supplies
🟡 Intermediate
Time: 30-60 minutes per napkin
Methods:
- Machine embroidery
- Hand embroidery (basic stitches)
- Cricut cutting machine projects
- Block printing
Tools needed: Sewing machine or embroidery machine
🔴 Advanced
Time: 1-3 hours per napkin
Methods:
- Hand embroidery (complex designs)
- Making napkins from scratch
- Professional-style monogramming
- Mixed media techniques
Tools needed: Advanced sewing/embroidery tools
Method 1: Iron-On Transfer Monograms (Beginner)
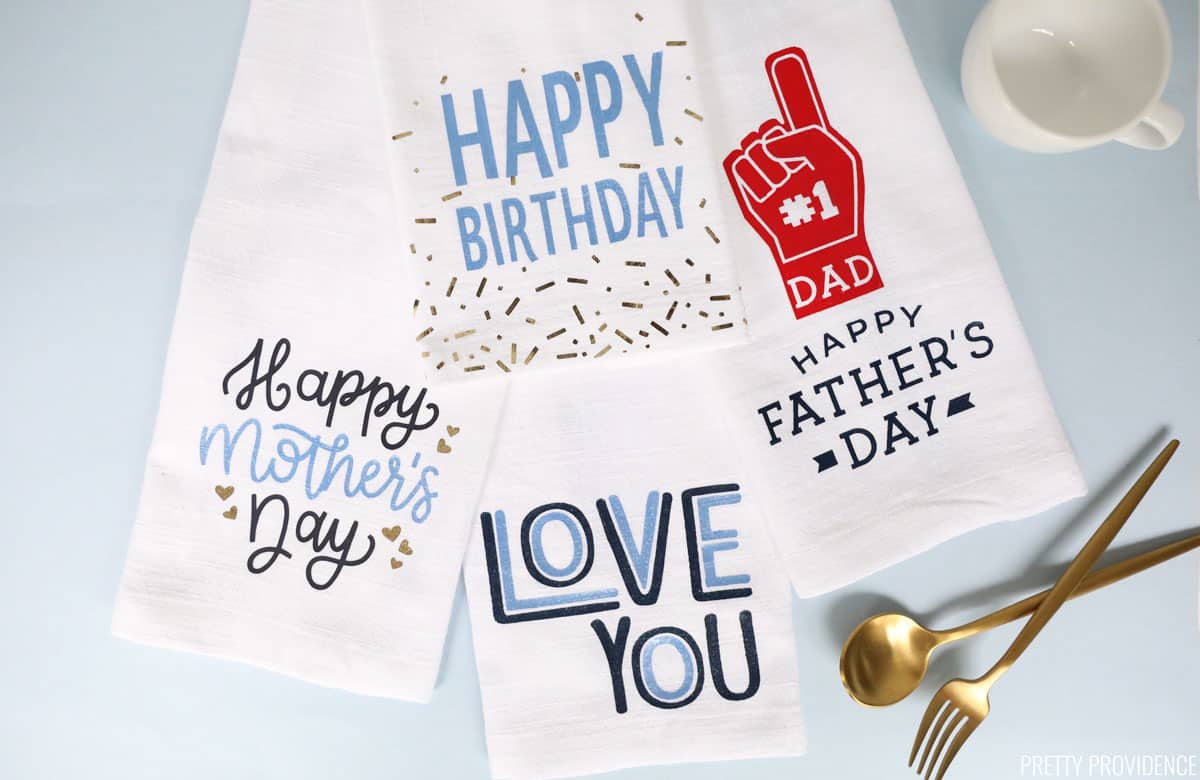
Iron-on transfers are perfect for beginners who want professional-looking results without advanced skills. This method works best on cotton and cotton-blend napkins.
Supplies Needed
Materials:
- Plain napkins (cotton or cotton-blend work best)
- Iron-on transfer vinyl or paper
- Transfer tape (for vinyl)
Tools:
- Computer and printer (for paper transfers)
- Cutting machine (Cricut, Silhouette) or craft knife
- Weeding tools
- Iron or heat press
- Parchment paper
Design Software:
- Cricut Design Space (free)
- Silhouette Studio (free)
- Microsoft Word or PowerPoint
- Free online monogram generators
Step-by-Step Instructions
Design Your Monogram
- Open your design software
- Choose a font appropriate for your occasion
- Create monogram with initials (typically First, Last large, Middle)
- Size appropriately for your napkin (2-3 inches for dinner napkins)
- Important: Mirror/flip your design for iron-on transfers
Cut Your Design
- Load iron-on vinyl onto cutting mat (shiny side down)
- Send design to your cutting machine
- Use appropriate pressure settings for iron-on material
- If cutting by hand, use a sharp craft knife and steady pressure
Weed Your Design
- Remove excess vinyl around your letters
- Use weeding tools to remove small pieces inside letters (like inside 'A', 'O', etc.)
- Take your time - rushing can tear delicate parts
- Leave the backing on the letters you want to keep
Position Your Design
- Lay napkin flat on ironing board
- Position design where you want it (typically bottom right corner or center)
- Use a ruler to ensure consistent placement across multiple napkins
- Double-check that design is straight and centered
Apply Heat Transfer
- Set iron to appropriate temperature (check vinyl specifications)
- Cover design with parchment paper
- Press firmly for recommended time (usually 15-20 seconds)
- Apply even pressure - don't slide the iron
- Allow to cool completely before removing backing
Finish and Test
- Carefully peel away the backing/transfer tape
- If any edges lift, reapply heat
- Test wash one napkin before completing entire set
- Press again with parchment paper for extra durability
Pro Tips for Iron-On Success
Temperature Matters
Different materials require different temperatures. Always test on a scrap first.
Pre-wash Napkins
Wash and dry napkins before applying transfers to remove sizing and prevent shrinkage.
Practice First
Try your technique on a test fabric before working on your actual napkins.
Batch Process
Cut all designs at once, then weed all at once for efficiency.
Method 2: Hand Embroidery Monograms (Intermediate-Advanced)
Hand embroidery creates beautiful, heirloom-quality monograms with a personal touch. While more time-intensive, the results are stunning and durable.
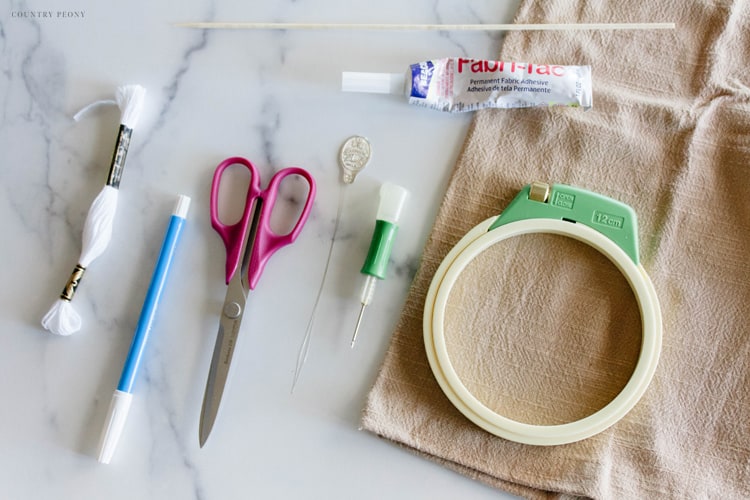
Embroidery Supplies
Essential Supplies:
- Linen or cotton napkins
- Embroidery floss in desired colors
- Embroidery needles (size 5-8)
- Embroidery hoop (6-8 inch)
- Fabric marking pen (water-soluble)
- Transfer paper
- Small scissors
Helpful Additions:
- Thimble
- Needle threader
- Good lighting or magnifier
- Pattern templates
- Embroidery scissors
Basic Embroidery Stitches for Monograms
Backstitch
Best for: Outlining letters, creating clean lines
Technique: Create a continuous line by stitching backward to fill gaps
Satin Stitch
Best for: Filling in letter shapes, solid coverage
Technique: Parallel stitches placed closely together
French Knots
Best for: Decorative dots, texture elements
Technique: Wrap thread around needle and pull through fabric
Chain Stitch
Best for: Decorative outlines, vintage look
Technique: Create loops that link together like a chain
Hand Embroidery Process
1. Design Transfer
- Print or draw your monogram design
- Use transfer paper to copy onto napkin
- Position carefully and trace lightly
- Test water-soluble pen on fabric scrap first
2. Hoop Setup
- Place napkin in embroidery hoop
- Ensure fabric is taut but not overstretched
- Center your design in the hoop
- Adjust tension as needed while working
3. Start Stitching
- Use 2-3 strands of embroidery floss
- Begin with outlines using backstitch
- Fill in solid areas with satin stitch
- Work from center outward when possible
4. Finishing Touches
- Remove from hoop carefully
- Press from wrong side to avoid flattening embroidery
- Wash out marking lines if using water-soluble pen
- Trim any loose threads
Method 3: Machine Embroidery (Intermediate)
If you have access to an embroidery machine, you can create professional-looking monograms efficiently. This method requires initial setup time but allows for consistent results across multiple napkins.
Machine Embroidery Basics
What You Need:
- Embroidery machine (or sewing machine with embroidery capability)
- Embroidery software or built-in designs
- Embroidery thread in desired colors
- Stabilizer (appropriate for napkin weight)
- Embroidery hoops in correct sizes
Basic Process:
- Design Creation: Use embroidery software to create or import monogram designs
- Stabilizer Application: Apply appropriate stabilizer to napkin back
- Hooping: Carefully hoop napkin with stabilizer
- Thread Setup: Load appropriate thread colors in correct order
- Machine Setup: Select design, adjust positioning, set tensions
- Embroidering: Let machine complete the design
- Finishing: Remove stabilizer, trim threads, press if needed
Method 4: Making Napkins from Scratch (Advanced)
Creating napkins from fabric gives you complete control over size, material, and finishing details. This advanced method requires sewing skills but allows for total customization.
Sewing Supplies Needed
- Fabric (linen, cotton, or your preferred material)
- Sewing machine
- Thread matching fabric color
- Sharp fabric scissors
- Rotary cutter and ruler (optional but helpful)
- Iron and ironing board
- Seam ripper
- Pins or fabric clips
Napkin Construction Process
1. Cut Fabric
- Decide on finished size (common sizes: 16"x16", 18"x18", 20"x20")
- Add 1 inch to each dimension for hem allowance
- Cut fabric squares accurately
- Press fabric to remove wrinkles
2. Create Hems
- Fold each edge over ¼ inch, then ¼ inch again
- Press folds with iron for crisp edges
- Pin corners for mitered finish (optional)
- Use consistent measurement for all napkins
3. Sew Hems
- Use straight stitch close to inner fold
- Start and end with backstitches
- Keep stitching consistent across all edges
- Press finished napkin
4. Add Monogram
- Choose your preferred monogramming method
- Position consistently across all napkins
- Complete before final pressing
DIY vs. Professional Cost Comparison
Example: 50 Cocktail Napkins
| Method | Material Cost | Time Investment | Total Cost | Cost per Napkin |
|---|---|---|---|---|
| Iron-on Transfers | $25-40 | 5-8 hours | $25-40 | $0.50-0.80 |
| Hand Embroidery | $30-50 | 25-50 hours | $30-50 | $0.60-1.00 |
| Machine Embroidery | $35-55 | 8-12 hours | $35-55 | $0.70-1.10 |
| From Scratch + Monogram | $40-70 | 15-25 hours | $40-70 | $0.80-1.40 |
| Professional Custom | N/A | N/A | $150-400 | $3.00-8.00 |
Additional Considerations
Initial Tool Investment
Factor in one-time costs for cutting machines, embroidery hoops, or sewing machines if you don't own them.
Learning Curve
First projects take longer as you learn techniques. Efficiency improves with practice.
Quality vs. Professional
DIY results may not match professional quality, especially for complex designs or fine materials.
Time Value
Consider the value of your time when calculating true costs. DIY is time-intensive.
Common DIY Problems & Solutions
Problem: Iron-on vinyl not sticking
Solutions:
- Increase iron temperature (check vinyl specifications)
- Apply more pressure during heat application
- Extend pressing time
- Pre-wash fabric to remove sizing
- Use parchment paper, not wax paper
Problem: Embroidery puckering
Solutions:
- Use appropriate stabilizer for fabric weight
- Don't over-tighten embroidery hoop
- Check thread tension settings
- Use smaller stitch length for dense areas
- Support fabric properly while stitching
Problem: Uneven lettering
Solutions:
- Use guidelines for consistent baseline
- Measure and mark placement carefully
- Create templates for repeated designs
- Practice on test fabric first
- Use consistent thread tension
Problem: Designs washing out
Solutions:
- Use appropriate heat setting for materials
- Allow full cooling before removing backing
- Wash in cold water, gentle cycle
- Turn napkins inside out when washing
- Air dry or use low heat setting
🛍️ DIY Supplies Shopping Guide
Cutting Machines & Tools
Essential tools for precise cutting and professional-looking results
Embroidery Supplies
High-quality embroidery materials for beautiful hand-stitched monograms
Iron-On Materials
Vinyl, transfer papers, and heat-application materials for easy customization
Fabric & Blank Napkins
Quality base materials for your DIY napkin projects
Creative DIY Project Ideas
Wedding Countdown Napkins
Create a series of napkins for pre-wedding events with countdown numbers or dates
Family Recipe Napkins
Embroider snippets of family recipes or cooking quotes for a personalized kitchen set
Holiday Progression Set
Create napkins for different holidays throughout the year with seasonal motifs
Guest House Collection
Make napkins with local landmarks or welcome messages for vacation rentals
Kids' Art Napkins
Transfer children's drawings onto napkins for special family keepsakes
Photo Transfer Napkins
Use photo transfer techniques to create napkins with meaningful images